A vacuum can gradually demand extra passes until you start treating poor pickup as normal. Preventive maintenance works better when you keep a reference for what good pickup looks like, then check the parts that collect dust and hair before changing settings or buying replacements.
This routine covers ordinary dry household vacuums with owner-accessible bins, bags, filters and attachments. Use your exact model’s manual throughout; robot docks, wet-and-dry machines and carpet washers need their own procedures. The aim is a short, repeatable inspection with a clear stopping point.
Make a machine record before opening anything
Find the model number on the rating label and match it to the manufacturer’s manual, including any suffix. A product family name alone may cover different filters or floorheads. Save the maintenance pages where everyone who uses the vacuum can find them.
Put these details in a note:
- Exact model, bag or bin type, and replacement part references.
- Each filter’s location, cleaning method and replacement instruction.
- Which roller covers and airflow connections the owner may release.
- The meaning of warning lights and the prescribed response.
Gather a waste bag, a dry cloth, the manual and a clear work surface. Add only the cleaning tools the manual specifies. Keep removed parts arranged in their installation order; a quick photograph can help with orientation.
For a corded vacuum, switch off and unplug before maintenance or changing accessories. For cordless equipment, switch off, disconnect charging and follow the manual’s battery-isolation procedure; remove a battery only if designed for owner removal. Leave electrical housings closed. The Miele Dynamic U1 operating instructions illustrate the boundary between owner maintenance and repairs reserved for authorized service.
Choose a reference patch you can revisit
Pick a familiar stretch of floor that the vacuum and its attachment are approved to clean. Use ordinary household debris already present. Do not scatter flour, powders or grit to create a suction test. A repeatable observation is enough; you are not measuring laboratory suction.
Record the attachment, floor setting, suction mode and, for cordless models, whether the battery was adequately charged. Note whether normal visible debris clears with your usual slow passes, whether the head pushes debris ahead, and whether hair remains on carpet. Compare like with like: a different rug or power mode makes a weak reference.
Hypothetical example: your hallway normally looks clear after one outward and return pass in the manufacturer’s hard-floor mode. Later, crumbs remain after the same movement. That observation triggers an inspection; it does not prove the motor is failing. If a rug alone becomes difficult to push after changing its setting, first consult the floorhead instructions.
Write observations in plain language rather than assigning a percentage to suction. “Hair remains along the centre of the pass” is more useful later than “seems weaker.”
Read dust capacity as two different signals
During the isolated inspection, check the bag or bin using the manual’s fill limit and indicator procedure. Empty a bagless container before material exceeds its maximum mark. Open it low over a waste bag, close the waste bag afterward, and check that the container flap and latch are clear before refitting.
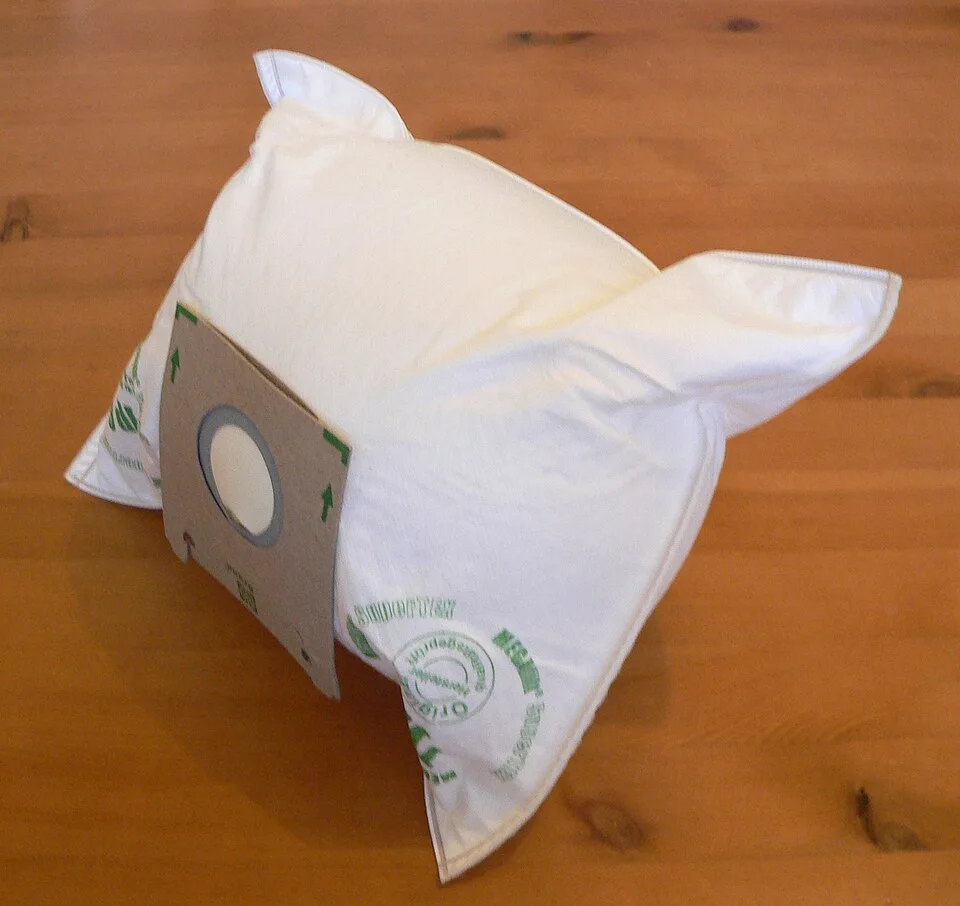
The photograph exposes the bag’s inlet collar and surrounding fabric, features to compare with the exact replacement specified in the vacuum manual. Keep the correct spare identified beside the maintenance record. The pictured bag has no readable capacity limit or compatible-model list, so its shape does not establish fit, a fill threshold or the appliance’s indicator procedure.
Photo & usage
Photograph: Frank C. Müller, Baden-Baden · CC BY-SA 4.0 · Source. Display copies resized and encoded as WebP; no instructional details were fabricated or removed.
A bag’s appearance cannot tell the whole story. Miele’s FilterBag indicator guidance explains that fine material can obstruct bag pores before the bag looks full, while bulky hair can fill it before the indicator reacts. Follow both the physical-capacity instruction and the model’s airflow indication.
Hypothetical example: a household notes that its bag indicator requests a change while the bag still looks relatively flat. Repeatedly opening the compartment to inspect volume will not resolve restricted pores. Record the indicator and replace the bag as instructed, rather than waiting for it to swell.
Keep the correct spare bag beside the maintenance record. The useful stock level is enough to perform the next required change; a cupboard full of nearly matching bags creates another opportunity for an incorrect fit.
Give every filter its own instructions
Identify each filter before cleaning it. Record it as washable, dry-clean only, or replace-only according to its specific instructions. A filter’s colour, foam texture or HEPA description does not supply its care method.
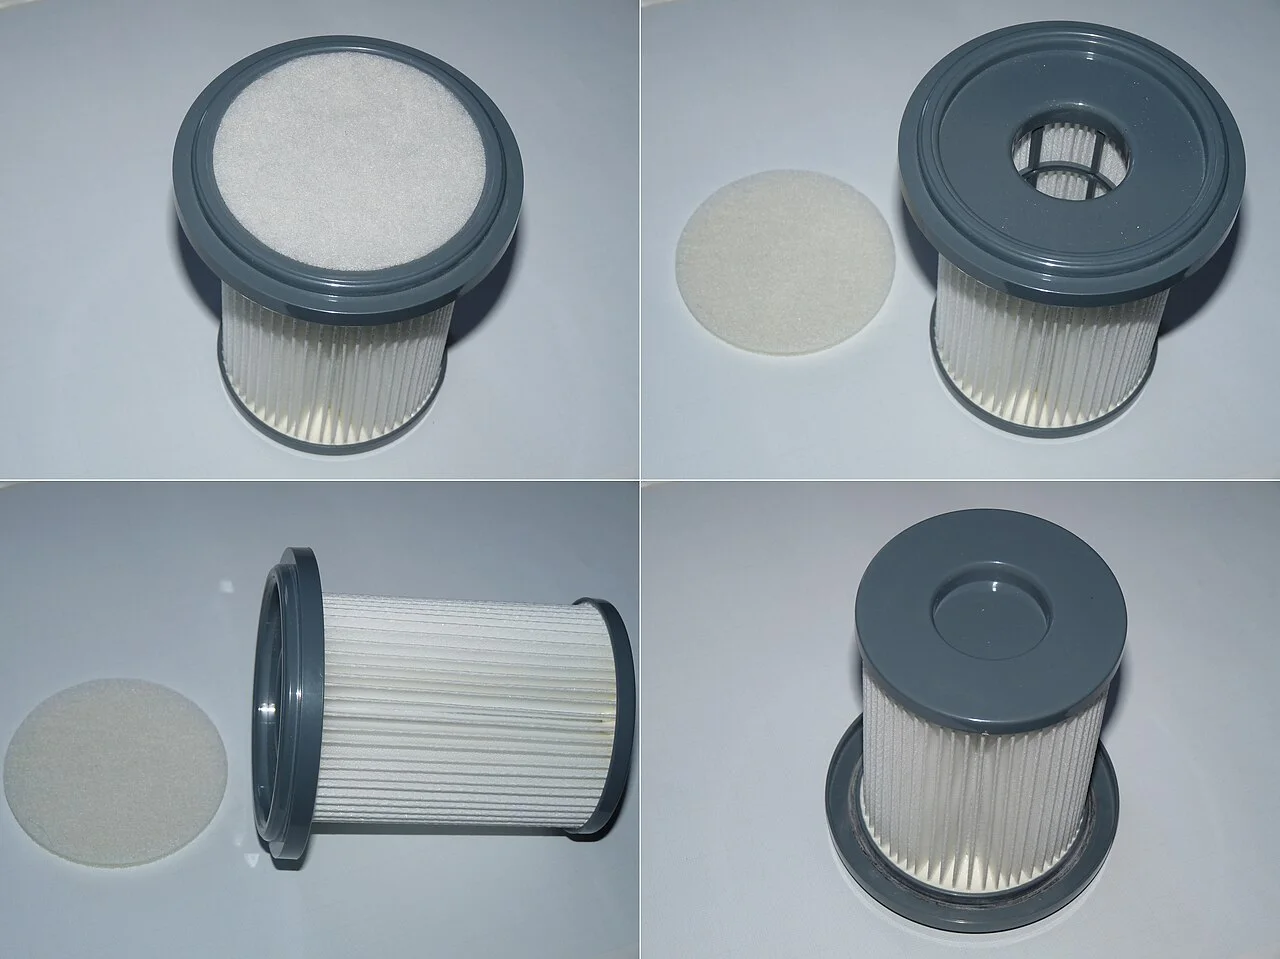
The reference shows several views of a particular Philips HEPA H10 filter. Similar-looking filters can have different instructions. The photograph does not establish that this filter, or yours, may be washed.
Photo & usage
Dmitry G · CC BY-SA 3.0 · Source. Display copies resized and encoded as WebP; no instructional details were fabricated or removed.
The difference is concrete. Dyson’s cordless filter-care guidance calls for washing applicable filters without detergent and allowing at least 24 hours of drying, with complete dryness required before installation. Miele’s Triflex guidance says not to wash the HX1 Facelift/HX2 fine dust filter or prefilter; it also prohibits brushing the fine dust filter. These instructions belong to those components, not every vacuum.
For an approved washable filter, follow the model’s water-temperature, handling and drying directions exactly. Treat a stated drying time as a minimum, not proof that a thick filter is dry. Dyson warns against tumble dryers, microwaves and naked flames. Leave the vacuum unavailable until its required parts are ready.
Use a small maintenance record to prevent hurried reassembly:
| Component | Permitted care | Return-to-use condition |
|---|---|---|
| Named washable filter | Exact model procedure | Required drying period elapsed; completely dry |
| Named dry-clean filter | Specified dry method only | Correctly seated after cleaning |
| Replacement filter | Replace at specified trigger | Correct part fitted in specified orientation |
Separate “washed on” from “ready to refit” in your note. That distinction helps when one person cleans the machine and another wants to use it.
Inspect the pickup head and visible airway
With power isolated, follow the manual’s releases to detach permitted attachments. Look into accessible openings and remove loose, reachable debris. Check the floorhead inlet, wand ends and hose connections. Stop if an obstruction cannot be reached through the specified owner access; avoid improvised probes or forcing material deeper.
Inspect the roller for wrapped hair and thread. Remove it only through the owner procedure. Use scissors only if the manual explicitly permits them and identifies where to cut. For example, Miele’s Triflex instructions identify a roller guide track. Keep blades away from bristles and other components.
Shark’s troubleshooting guidance includes filters, dust capacity, blocked connections and wrapped roller fibres among its poor-pickup checks. Give each item a separate entry in your note. That way, next time you can see whether one part repeatedly needs attention.
A useful distinction is where the failure appears: hair left on carpet suggests inspecting the head and its prescribed operating mode, while poor pickup across permitted attachments calls for checking the shared airflow path. Neither observation authorizes opening the motor housing.
Finish with a controlled return to use
Before restoring power, confirm every required bag, filter, cover and attachment is installed and secured. Check that latches engage without force. Never test pickup by running without a required filter or bag. Miele’s operating instructions explicitly prohibit that shortcut.
Return to your reference patch with the same approved attachment and settings. Keep hands and loose clothing away from operating openings and moving parts. Observe pickup and warning indicators during normal floor cleaning. If performance is restored, record what changed. If it remains poor, use the manufacturer’s model-specific troubleshooting sequence or arrange service.
Stop using a visibly damaged machine or one with cord or plug damage, and arrange qualified repair. For overheating or automatic shutdown, follow the exact manual’s isolation and cooling instructions. Shark’s cited procedure specifies a cooling interval for the equipment it covers; that interval is not universal. Repeated shutdown after the prescribed checks is a service boundary, not a reason to keep restarting.
THE WORKING FILE / INSPECTION
A full-looking bin and a blocked filter are different records
Imagine poor pickup with a bin below its marked limit. Emptying it may be sensible under the manual, but the result does not establish that the filter, brush roll or airway is clear. Record each user-serviceable component and its individual permission before opening anything.
Bin / bag
- Record before action
- Marked limit or model-specific indicator
- Return-to-use proof
- Correctly refitted
Filter
- Record before action
- Washable or replace-only; drying instructions
- Return-to-use proof
- Ready exactly as the manual requires
Brush / head
- Record before action
- Visible obstruction, isolation procedure
- Return-to-use proof
- Refitted with guards intact
Reference floor area
- Record before action
- Ordinary debris and surface type
- Return-to-use proof
- Comparable pickup without deliberately adding hazards
Read the result
Return to the same familiar floor patch after the documented maintenance. Improvement there is useful, but it does not certify suction pressure or filtration efficiency. If the machine’s indicator behaves differently when a tool is attached, interpret it using that model’s instructions. A washable filter is not interchangeable with another filter that merely looks similar.
Your inspection record Blank worksheet
Link the correct consumable or maintenance action to a repeatable pickup check.
- Model
- ________________________________
- Symptom
- ________________________________
- Component permission
- ________________________________
- Action and date
- ________________________________
- Filter dry / replacement reference
- ________________________________
- Reassembly check
- ________________________________
- Reference patch result
- ________________________________
- Fault / service follow-up
- ________________________________
Before closing the file
- Each filter has its own instruction.
- Parts are ready before reassembly.
- The result is checked on the same ordinary task.
Schedule the next check around what you find
Use the manual’s intervals as the starting schedule, then add brief inspections when household conditions change: heavier pet shedding, new carpet fluff or more frequent cleaning. Do not turn an inspection reminder into an instruction to wash every filter.
Hypothetical example: a household finds roller hair during each scheduled check but rarely finds a blocked wand. It adds a roller inspection after its main carpet-cleaning session and keeps the manual’s filter schedule. The record now responds to observed buildup without unnecessary dismantling.
Finish each entry with the date, component, action and reference-patch result. Put the next due task beside the part number and manual link. This gives the next person enough information to maintain the vacuum before extra passes become the household’s new normal.
THE REFERENCE FILE
Sources & scope
Documentation reviewed 1 Nov 2026. Examples are illustrative; this article does not claim hands-on product testing. Follow the instructions for your actual material, model and location.