A pale leather seat can show a dark hand mark, a blue transfer from clothing or a worn area where the coating has thinned. They may look similar from a distance, but only some are ordinary removable soil. Strong rubbing can remove finish while appearing to lift the stain. Begin by confirming the leather type and checking whether the colored surface remains sound.
This guide concerns identified pigmented or protected upholstery leather. It does not apply automatically to aniline, nubuck, suede, bonded leather or vinyl. The word genuine describes neither the exposed finish nor the approved cleaner. Keep the furniture maker's instructions beside the product rather than selecting a treatment solely because its bottle says leather.
Confirm the leather category from records
Look for the upholstery name on the invoice or furniture label and ask the supplier which finish it uses. Carl Hansen & Son distinguishes pigmented leather from aniline, semi-aniline and saddle leather in its care guidance. La-Z-Boy also states that leather types have their own specifications. Ethan Allen's guide provides further furniture-specific care context.
Use the actual product record to decide which method applies. A droplet absorption test or a hidden scratch can leave a new mark and still fail to identify a later coating. If the category is unknown, gently collect loose dust with a clean soft cloth and resolve the identity before adding liquid or conditioner. A naturally uneven grain is not proof that the leather is unprotected, and a glossy surface is not proof that every solvent is safe.
Read the mark and coating condition
Inspect in diffuse light and from a low angle. Record whether the darkening follows a headrest, arm, seam or clothing contact area. Look for cracks, peeling, exposed lighter material or a rough patch that catches the cloth. Do not pull a peeling edge to see how far it extends.
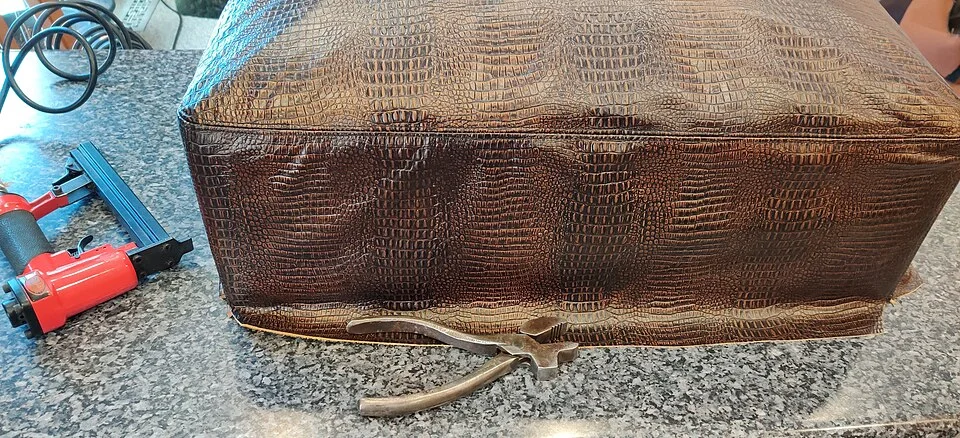
The close view exposes a broad contact panel, stitched edge and lower fold, useful landmarks for recording where a mark or surface change occurs. Compare your own seat in diffuse light and at a low angle before cleaning. This upholstery-work photograph does not identify a pigment coating, demonstrate cleaning or justify using the visible workshop tools on a mark.
Photo & usage
Eugenepik · CC BY-SA 4.0 · Source. Display copies resized and encoded as WebP; no instructional details were fabricated or removed.
A blue-gray mark after dark jeans suggests dye transfer as a possibility, while a worn arm edge suggests finish loss. These are observations to report rather than diagnoses from color alone. Photograph the whole seat and the detailed patch before cleaning. If the coating is flaking, sticky or already transferring color during gentle dry contact, stop wet treatment and ask a leather repair specialist about its condition.
Remove dry debris without abrading seams
Dust sound surfaces with a clean undyed soft cloth. Use only the maker-approved vacuum attachment and setting for seams, checking the nozzle for grit and rough edges. Do not force a hard crevice tool against piping or stitching. Lift loose crumbs rather than dragging them across the colored surface.
Keep cloths used for furniture polish or kitchen grease out of this job. A leather cleaner can seem to fail when the applicator adds a new oily layer. Remove jewelry or hard accessories that could scrape the seat during work. If the piece has fabric panels, wood trim or a powered mechanism, record their separate care requirements and protect them from any liquid stage.
Trial the approved cleaner on sound representative leather
Select the product specified for the identified leather and read its complete instructions. Some makers permit a well-wrung damp cloth for light soil, while others specify a dedicated cleaner. Do not generalize a brand's soap recipe across unrelated leathers. Prepare the method away from the seat so liquid cannot spill into a seam.
Test an inconspicuous representative area and complete all required removal and drying stages. Check for color transfer, darkening that remains, changed sheen, stiffness or tackiness. Stop if the test changes the finish. A hidden backing material or unfinished underside is not representative of the visible coated leather. Success also does not authorize a stronger concentration, longer contact or repeated rubbing of an already worn patch.
Clean a manageable panel with controlled moisture
Use the permitted undyed cloth and light pressure. Keep liquid from pooling in seams or around buttons. Work within the maker's panel or seam boundaries and collect lifted soil with fresh cloth faces. Do not scrub one tiny spot until it becomes visibly different from the surrounding seat.
Remove product residue exactly as directed, then allow the authorized drying conditions. Avoid alcohol wipes, bleach, kitchen degreaser and abrasive erasers unless the leather maker explicitly approves a specific method. A product's use on car interiors or footwear does not establish compatibility with household upholstery. If the cloth begins carrying the seat's color rather than obvious surface soil, stop and preserve the observation for the supplier.
Compare the dry results by problem type
| Dry result | Working interpretation | Decision |
|---|---|---|
| Hand soil removed; sheen matches | Routine surface cleaning worked | Resume documented care |
| Blue transfer remains on intact coating | Color transfer may need specialist treatment | Ask for a finish-compatible method |
| Pale rough area remains at an edge | Finish wear may be present | Seek repair assessment |
| Color transfers during the trial | The coating may be unstable or affected | Stop further cleaning |
The observations are invented examples, not measured results. Several can coexist on a frequently used seat. Give the specialist the upholstery name, photographs and the exact product already used. A useful request asks whether the remaining mark is removable transfer or coating damage, rather than demanding that every dark area be scrubbed until pale.
Keep conditioning separate from cleaning
Conditioner is not a universal stain remover. The correct leather may require a named maintenance product, a particular frequency or no added conditioner at all. Carl Hansen & Son cautions that care products applied to worn or dirty leather can produce color changes. Follow the actual maker's requirements rather than adding cream whenever a seat looks dull.
Do not apply cooking oil, furniture wax or shoe polish to conceal a worn patch. They can alter appearance, transfer onto clothing and complicate professional repair. If a product is recommended after cleaning, wait for the required dry state and follow its full instructions. Test and record that stage separately so a later change can be traced to cleaning or maintenance rather than an undocumented combination of both.
Describe the wear pattern with an illustrative map
Suppose an illustrative seat has three panels: a center panel 40 by 50 centimeters and two side panels each 10 by 50 centimeters. Their areas are 2,000 and 500 square centimeters each, totaling 3,000 square centimeters. The center is two-thirds of the visible panel area, but that does not mean it should receive two-thirds of a cleaner bottle.
The calculation simply helps describe where a mark sits. Record whether it crosses stitching or remains on a single panel, and whether the adjacent panel has a different sheen. Avoid using area to invent product doses or drying times. A small damaged edge may need more careful repair than a broad intact panel with ordinary soil, so location and condition matter alongside size.
Finish with a stable color coat
Inspect after the required drying period and before normal use. The leather should have no new tackiness, pale abrasion or changed hand from the treatment. Check seams for retained liquid without forcing them open. Keep direct heat and strong sunlight outside the drying plan unless the maker specifically instructs otherwise.
Record the method that removed soil and the remaining wear or transfer issue. Use suitable routines for fresh spills and avoid continued contact from non-colorfast clothing where that has been identified. Completion means the surface soil is removed within the finish's limits and the colored coating remains stable. If the remaining problem is coating loss, move to repair advice rather than another stronger cleaner.
THE REFERENCE FILE
Sources & scope
Documentation reviewed 1 Nov 2026. Examples are illustrative; this article does not claim hands-on product testing. Follow the instructions for your actual material, model and location.