The dark corners of an old chest are not necessarily dirty corners. They may contain aged finish, intentional shading, old wax and later polish, all beside fragile veneer or decoration. A bright patch produced by enthusiastic rubbing can remove useful evidence and leave an appearance that no longer matches the piece. Start with the smallest practical aim: remove loose dust without changing the finish.
This is a household care route for a piece believed to have a waxed surface, not a stripping or restoration recipe. If the furniture is valuable, historically significant or poorly documented, a conservator should decide whether accumulated material ought to remain. A modern furniture cleaner's claim about wood does not settle its suitability for aged coatings.
Survey the chest before choosing tools
Empty the top and inspect the furniture where it stands. Look along mouldings, around handles and at veneer edges. Photograph lifting flakes, open joints and loose decorative pieces without pressing them back. A wax-like sheen may sit over shellac, paint or another older finish, so record what is known and what is assumed.
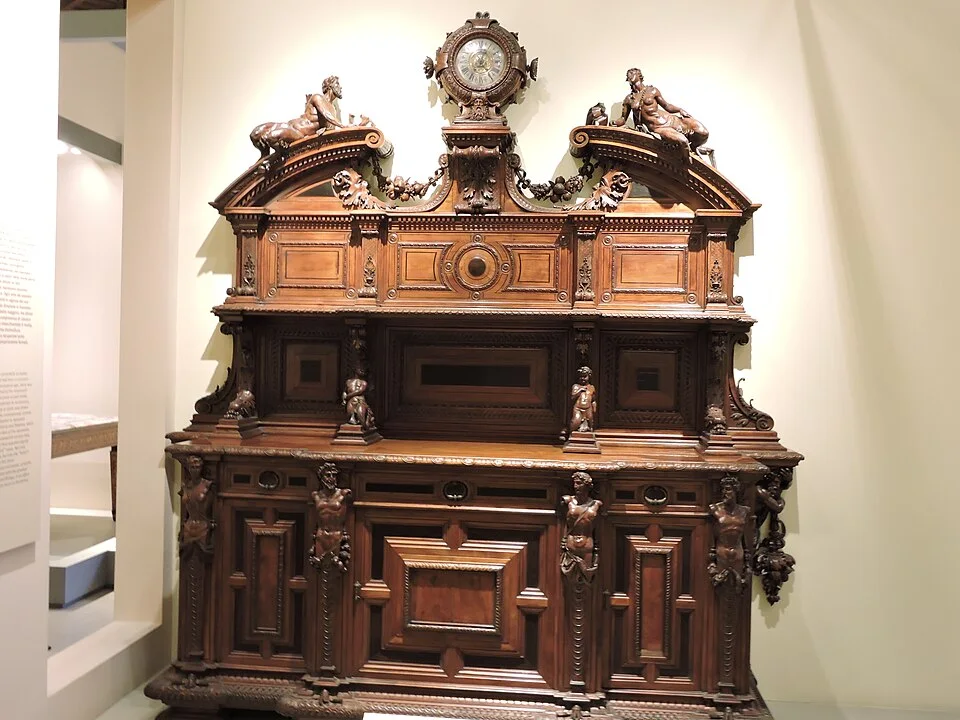
The carved figures, moulded ledges and narrow recesses show why one broad wiping motion cannot suit every part of antique furniture. Survey your chest where it stands, photograph loose decoration or lifting edges, and leave unstable areas untouched. The pictured cabinet does not identify a wax finish or prove that its projecting parts are firmly attached; establish condition before choosing a cloth or brush.
Photo & usage
Harvinder Chandigarh · CC BY-SA 4.0 · Source. Display copies resized and encoded as WebP; no instructional details were fabricated or removed.
History Nebraska's conservation guidance tells readers to assess condition before cleaning and to leave deteriorated surfaces and loose components to a conservator. AICCM similarly treats furniture as a combination of materials. Apply that reasoning to the chest: a stable broad top and an unstable gilded detail need different handling. Where particles appear to be finish rather than ordinary dust, pause instead of testing whether they will wipe away.
Separate dust from the appearance you want to keep
Loose dust generally sits on exposed horizontal surfaces and in recesses. An evenly darkened area following carved detail may be patina, a coating or old material deliberately left by previous treatment. Fingerprints in wax can resemble grease, while worn edges can look brighter because their finish has already thinned. None of these observations supports an automatic deep clean.
Compare the front with a sheltered side using the same light. Do not remove handles or force a drawer to expose an untouched sample. Such an area may have aged differently for reasons unrelated to dirt. Avoid making a bright test patch in a visible corner; even a small irreversible change can be conspicuous on a uniformly aged object.
Build a low-pressure dusting route
Choose a clean, soft cloth without loose loops that can catch decoration. For sound intricate areas, a very soft brush may move dust toward a collection point, with no pressure against edges. Keep brushes used for shoes, paint or household grit out of this job. Support a drawer or door only as its construction permits; cleaning should not become a stability test.
Start at the top and work downward so collected dust does not land on finished work. Make short gentle passes, lifting the cloth between them. Change to a clean face as it soils. Around carving, follow the form rather than rubbing across projecting tips. Keep loose fragments in a labelled container if one is found; note where it came from and ask for advice rather than throwing it away as debris.
Use suction only where condition allows
A household vacuum can remove dust while also pulling away weak decoration. History Nebraska describes low suction and a screened attachment for appropriate stable pieces. That is a condition-dependent conservation technique, not permission to vacuum every antique. If suction cannot be adjusted or the surface is uncertain, use the gentle manual route on sound areas and refer the rest.
Never drag a hard nozzle over the finish. Keep the hose from striking legs and handles as you turn. A second person can manage the hose around a large chest, provided they support furniture only by sound structural parts. Stop if the brush lifts flakes, fibers snag or the object moves. Powerful suction is not a substitute for checking attachment cleanliness and surface stability.
Treat wax renewal as a separate decision
A dusty chest does not automatically need fresh wax. New wax can build in recesses, change sheen and complicate later treatment. Furniture polish may add silicone or other residues; oil can alter the appearance of a waxed or coated surface. Ask what is already present before adding a layer that will eventually need removal.
If a conservator or maker identifies a compatible renewal, obtain its preparation and application instructions separately. Do not improvise with solvent, steel wool or an abrasive kitchen pad. A dark cloth after solvent rubbing might represent removed finish as well as dirt. It therefore cannot serve as proof that the treatment was successful. For ordinary upkeep, an even, stable surface after dry dusting can be an entirely complete result.
Compare observations without promising restoration
| Area | Observation during gentle dust removal | Decision |
|---|---|---|
| Sound top panel | Gray dust transfers; sheen remains even | Continue with fresh cloth faces |
| Carved corner | Brush catches an edge that moves | Stop contact and photograph the detail |
| Dark handle recess | Color remains after loose dust is gone | Preserve it pending identification |
The observations are invented examples, not results from hands-on testing. Their value is the differing decisions. The remaining dark recess is not a failed cleaning percentage; the moving corner is not a cue for stronger brushing. Write down where the method worked and where it stopped so a future cleaner does not repeat the uncertain experiment.
Keep the room from creating new marks
Place drinks elsewhere or use a finish-compatible protective arrangement that cannot trap condensation against the top. Avoid adhesive pads attached directly to an aged finish. Check beneath decorative objects periodically for dust and moisture, lifting each one rather than sliding it. Do not cover the top permanently with plastic to preserve its new appearance.
Keep the chest away from direct heat and severe environmental swings where practical. If it must move, empty manageable contents and plan the route. Lift by sound structural parts with enough help; do not pull handles, decorative rails or the top as if every joint were secure. Ethan Allen's modern furniture guidance also stresses sensible handling, but antique weaknesses require a more conservative assessment than a modern product's routine instructions.
Keep metal hardware outside the wax decision
An antique chest's handles may have an intentional patina or their own protective coating. Do not polish them while they remain surrounded by fragile wood merely because the chest is being dusted. Metal polish can lodge beside escutcheons and change the appearance of adjacent finish. Use a separate dry cloth for sound hardware and leave uncertain deposits for assessment.
Photograph any old pale polish residue around a screw rather than excavating it with a pick. Removing a handle can expose weak fixings or disrupt its original position, so access needs a conservation decision of its own. In the care record, distinguish the wood top, carved details and metal fittings. A statement that only stable wood surfaces received gentle dry dusting is more informative than calling the entire chest cleaned and polished.
Leave a useful care record
Take a final photograph from the same viewpoint. Note that the treatment was dry dusting, list the tools used and identify any areas left untouched. A useful note says right front carving moves under light brush contact, rather than needs cleaning. Include the history of wax or polish if known, even when the brand is uncertain.
Completion means loose dust has been reduced on stable areas, no new bright patches or snagged edges appeared and all fragments were retained. A persistent stain or uneven wax layer can remain a separate conservation question. That boundary protects the furniture and gives the next person reliable information about what has actually been done.
THE REFERENCE FILE
Sources & scope
Documentation reviewed 1 Nov 2026. Examples are illustrative; this article does not claim hands-on product testing. Follow the instructions for your actual material, model and location.