A shiny chrome chair leg can carry fingerprints, dried water marks and orange specks in the same small area. They do not necessarily share one cause. Chrome is commonly a thin plated finish over other materials, so aggressive polishing can expose rather than repair the layers below. Begin with ordinary soil removal and inspect the dry surface before choosing any special treatment.
This guide concerns chrome-plated furniture frames, with each product's maker instructions checked first. A bathroom fitting, plated chair and automotive trim can have different finishes and care permissions. A cleaner demonstrated on one category does not establish that its solvent, abrasive or application method belongs on another.
Confirm chrome rather than a similar silver finish
Find the furniture model and finish name. Polished stainless steel, nickel, chrome, metallic paint and powder-coated finishes can look similar in photographs. Ask the supplier to identify the exposed layer and any coating. Keep that information with the furniture record for future cleaning.
Carl Hansen & Son's metal care page separates chrome, stainless steel and powder-coated steel and gives different special-care boundaries. The Canadian Conservation Institute explains how a thin plated layer protects an underlying metal while it remains continuous. These sources support positive identification, not a household scratch test. Do not sand an inconspicuous patch to see what lies underneath or apply a magnet as if its response could certify the exposed coating.
Inspect the frame and joints before wet work
Look along the legs, welded areas and foot caps in good light. Photograph rough spots, blisters, flakes and orange deposits without picking them. Check whether upholstery, wood arms or floor protectors sit directly beside the metal. Those neighboring materials can be more sensitive than the broad chrome face.
If a structural joint is loose, cracked or unstable, stop using the furniture and obtain assessment; a cleaning routine cannot establish its load safety. If the concern is a superficial rough area, keep it in the observation record but do not brush off plating fragments as ordinary dirt. A smooth stain and a blistered surface deserve different next steps even when both reflect orange in a photograph.
Remove grit with separate clean tools
Dust sound surfaces gently using a soft clean cloth. Keep a different cloth for upholstery and wood so metal residue cannot transfer. Check the fabric for grit and hard debris before wrapping it around a narrow tube. Avoid dragging a rough seam over a vulnerable plated edge.
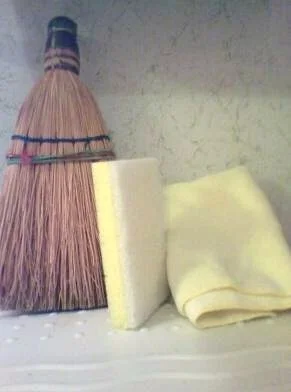
The folded cloth is distinguishable from the sponge and stiff broom, illustrating separate tool choices before approaching plated furniture. Inspect your soft cloth’s face and free edge for grit before wrapping a narrow tube, and reserve different cloths for metal, wood and upholstery. This arrangement does not identify the sponge’s abrasive grade or prove that any pictured tool suits a particular chrome finish.
Photo & usage
Chuck Marean · CC BY-SA 3.0 · Source. Display copies resized and encoded as WebP; no instructional details were fabricated or removed.
Use the maker-approved attachment if vacuuming dry dust from accessible crevices, without rubbing a hard nozzle against the finish. Do not push debris into a foot cap or dismantle the cap to reach it unless the furniture instructions permit that. If the frame is heavy, clean in its stable position or arrange appropriate help for handling. Turning a chair upside down on a delicate tabletop can create more damage than the dusting prevents.
Trial the routine chrome method
For the identified furniture, follow its permitted mild cleaning process. Carl Hansen & Son describes warm-water or mild-detergent wiping followed by drying for its chrome furniture. That example should remain attached to those products; use the actual maker's directions for the chair in front of you.
Test a small inconspicuous sound area and complete residue removal and drying. Look for haze, changed gloss, coating transfer or streaks before extending the method. Apply liquid with control around upholstery and joints rather than spraying the whole frame. Kohler's chrome-cleaning page, for example, describes use of its particular faucet cleaner; that does not convert a bathroom spray method into universal furniture permission. Product and surface compatibility must both be established.
Clean deposits and inspect the dry metal
Work along a manageable length of tube using light pressure and fresh cloth faces. Remove cleaner as directed and dry promptly, including accessible joint margins and the area above foot caps. Do not leave a wet wrap around an orange speck to soften it while cleaning another chair.
After drying, examine whether the mark has disappeared and whether the surface remains smooth. A dark pit or missing plated patch is a physical condition, not retained soap. A smooth fingerprint that vanishes with mild care is a completed routine job. Stop if the cloth snags, plating lifts or new color appears. Continued rubbing at a defect can enlarge the exposed region without reaching a stable bright endpoint.
Compare likely cleaning and repair questions
| Dry result | Possible meaning | Next action |
|---|---|---|
| Fingerprint gone; mirror finish matches | Ordinary contact soil was removed | Finish routine drying |
| White trail remains but surface is smooth | Deposit or cleaner residue may remain | Ask about a compatible deposit method |
| Orange spot sits in a rough pit | Plating damage and underlying corrosion may be involved | Seek finish assessment |
| Blister or flake lifts | Plating is unstable at that location | Stop abrasive contact |
These invented comparisons do not establish a corrosion type or predict repairability. CCI's plated-metal guidance explains that corrosion can occur where plating is perforated and can lift the surface. Use that as a reason to preserve the evidence and ask for assessment, not to scrape away the blister until a different metal appears.
Treat polish and solvent permissions literally
Some furniture manufacturers name a metal polish or solvent for particular chrome issues. Others impose different restrictions or use additional coatings. Do not turn a named product suggestion into a blanket claim that chrome always tolerates metal polish. Confirm the exact finish and whether the proposed treatment is intended for the observed deposit rather than active plating failure.
Read the cleaner label for tools, contact, removal and ventilation. Test only where the maker permits, and keep adjacent upholstery and wood outside the treatment unless independently compatible. Avoid aluminum foil rubbing, wire wool, abrasive drill pads and improvised acidic pastes as default rust methods. A shiny result can conceal newly thinned plating; appearance alone is not proof that the finish was preserved.
Count surfaces to plan cloth changes
Suppose an illustrative chair has four straight plated leg sections each 45 centimeters long. Their total length is 180 centimeters, or 1.8 meters, before rails and joints are included. Cleaning six such chairs involves 10.8 meters of those leg sections: 1.8 multiplied by six. These numbers describe workload, not product coverage.
The example explains why a cloth that was clean on the first chair may spread residue by the sixth. Inspect and change cloth faces as soil transfers instead of adding more cleaner to an increasingly dirty fabric. Work one chair to a complete dry result before repeating the method across the set. If one has pitting while the others are sound, keep its special-care decision separate from the routine workflow.
Complete the frame without hiding remaining defects
Check the dry frame from normal viewing angles and inspect accessible joints for retained liquid. No new haze, abrasive scratches or polish deposits should remain. Confirm that foot caps and supports were not displaced during cleaning, and return the furniture to use only under its care and condition requirements.
Record any pit, blister or recurring orange deposit and the exact products applied. Ask the supplier whether the remaining issue requires replating, component replacement or another repair route. Cleaning is complete when removable soil is gone and the stable finish has been preserved. Damage beneath a thin chrome layer is a separate question, not a reason to polish until every visible imperfection disappears.
THE REFERENCE FILE
Sources & scope
Documentation reviewed 1 Nov 2026. Examples are illustrative; this article does not claim hands-on product testing. Follow the instructions for your actual material, model and location.